 Go to App
 Subscribe
The 10x designer - Smart Automation with Kubric
The top metric at Kubric for the Data Science team is - “How do we reduce the amount of time spent by a designer on doing grunt work?”. We want to eliminate the grunt work that goes into micro-editing and quality checks so that designers can work on the stuff that truly matters to them - designing good content. Around this, we have created a set of micro-tools to help designers really get rid of that grunt work.And this is today powering thousands of creatives across different customer verticals from food to fashion and more. In this blog, I will talk about one such feature - Auto Position.
Outlining the Problem
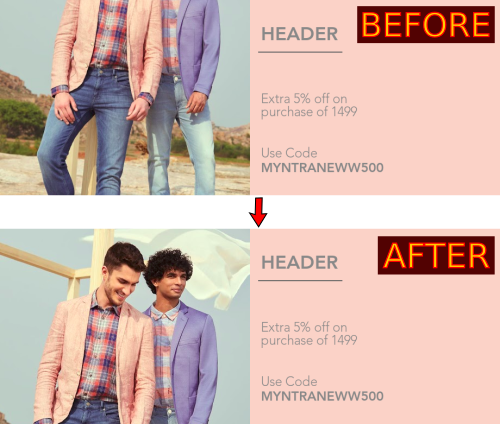
At Kubric, we help content teams scale up their output. Last year when we were analysing our content production workflow, we found some of the content being produced through Kubric being initialised like this (note the headless model) -
The user had to then spend time aligning and scaling the image to make it look just right. Imagine doing that for a 1000 pieces of content a day. It adds up to a lot of time spent on tedious work.. Around the time we started looking at this problem, Twitter published a blog talking about how they are using Saliency Detection to solve a similar problem. Taking inspiration from there, we were able to quickly implement a solution. The images started looking something like this now -
After releasing an initial version, we received feedback that while it did provide them with a better initialisation for the creative, it only focused on a very small, most salient part of the image and provided us with a very coarse salient region. They wanted more control over the automation. They wanted to control -
- the border,
- the ability to control which object to focus on and not the whole salient area
- Specify the alignment of the object of interest
The feedback helped us get a better understanding of the user needs and we came with an enhanced implementation.
Salient Object Detection
For the initial version, we used the SalGAN model, but it only provided us with a very coarse saliency map, and we required a much more fine-grained saliency map.
Thus, we decided to train our own model on open source saliency datasets (msra, DUT-OMRON). We used a Unet based encoder-decoder mobilenetV2 structure, using the amazing segmentation-model library. We used focal loss for training as class imbalance is relevant in the context of saliency prediction, for which the ground truth saliency map mainly consists of null or close to zero, creating a similar phenomenon.
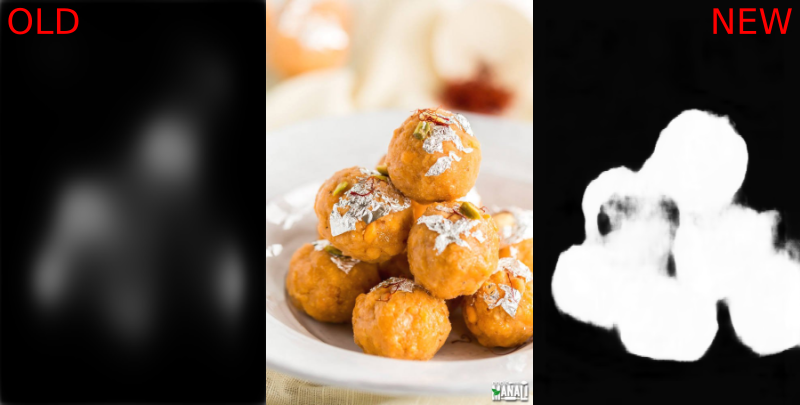
The approach is similar to weighted binary cross entropy, except that the weight is locally adjusted and based on a tunable gamma power of the predicted saliency. We tracked pixel error as the metric, which is a standard metric for saliency models. This is how the results differ between SalGAN and our model -
The new model was also way faster - we brought down the prediction time from an average 1.5 seconds to 0.3 seconds on a single cpu instance.
For object detection, most of the classes that we currently wanted to work on were present in this open source tensorflow model. Hence, we decided to use this model.
The Right Bounding Box
Another issue we faced was having multiple salient areas/objects in the image, and we needed to make a decision on whether to combine, reject the multiple boxes. For this, we implemented the following algorithm -
- See how big the box is relative to the image. If it is less than a threshold, reject the box.
- Take the biggest box, and create a distance matrix between this box and the other boxes.
- reject boxes which are farther than a threshold and combine the remaining.
This is how the results looked after doing this -

Computing the Scale & Position
After we have the coordinates of the largest bounding box,values from the auto-suggest request are used to -
- Resize the image maintaining the aspect ratio
- Threshold the saliency map and get the cooordinates for the bounding box
- Calculate the scale since we know the bounds where the object has to be and also the coordinates of the bounding box.
- Calculate the shift required to move the current bounding box of the object to the center of the image. After calculation, the difference needs to be scaled.
Deployment
The topic of ML deployments will get its own blog (subscribe to our blog to get notified when it’s out!) but for the sake of completeness, we’ll briefly cover how it works here.
Our ML models are deployed as independent micro-services. The models are wrapped in a Flask API with gunicorn running as the pre-fork executor. We support both sync (the caller waits for inference synchronously and keeps the HTTP connection open) and async deployments (the caller sends a message requesting inference and the model API raises an event notifying the caller once inference is done).
Synchronous/blocking APIs are essential for user-facing parts of the app such as the auto-position feature we are talking about here. On the other hand for things like asset enrichment, a pubsub kind of asynchronous deployment makes a lot more sense.
We dockerize this API and the docker image is deployed via our CI system as a microservice to our Kubernetes cluster. The Kubernetes cluster gets us a bunch of things for free such as CPU utilization based autoscaling, rolling deployments, A/B deployments etc. In our opinion, a container orchestration tool such as Kubernetes is a very essential part of any production machine learning workloads. This of-course requires that you have a DevOps team maintaining your infrastructure.
Auto position in action
The request to enable this feature for a storyboard is pretty straightforward, and is directly embedded into our editor.
This is how a request looks like -
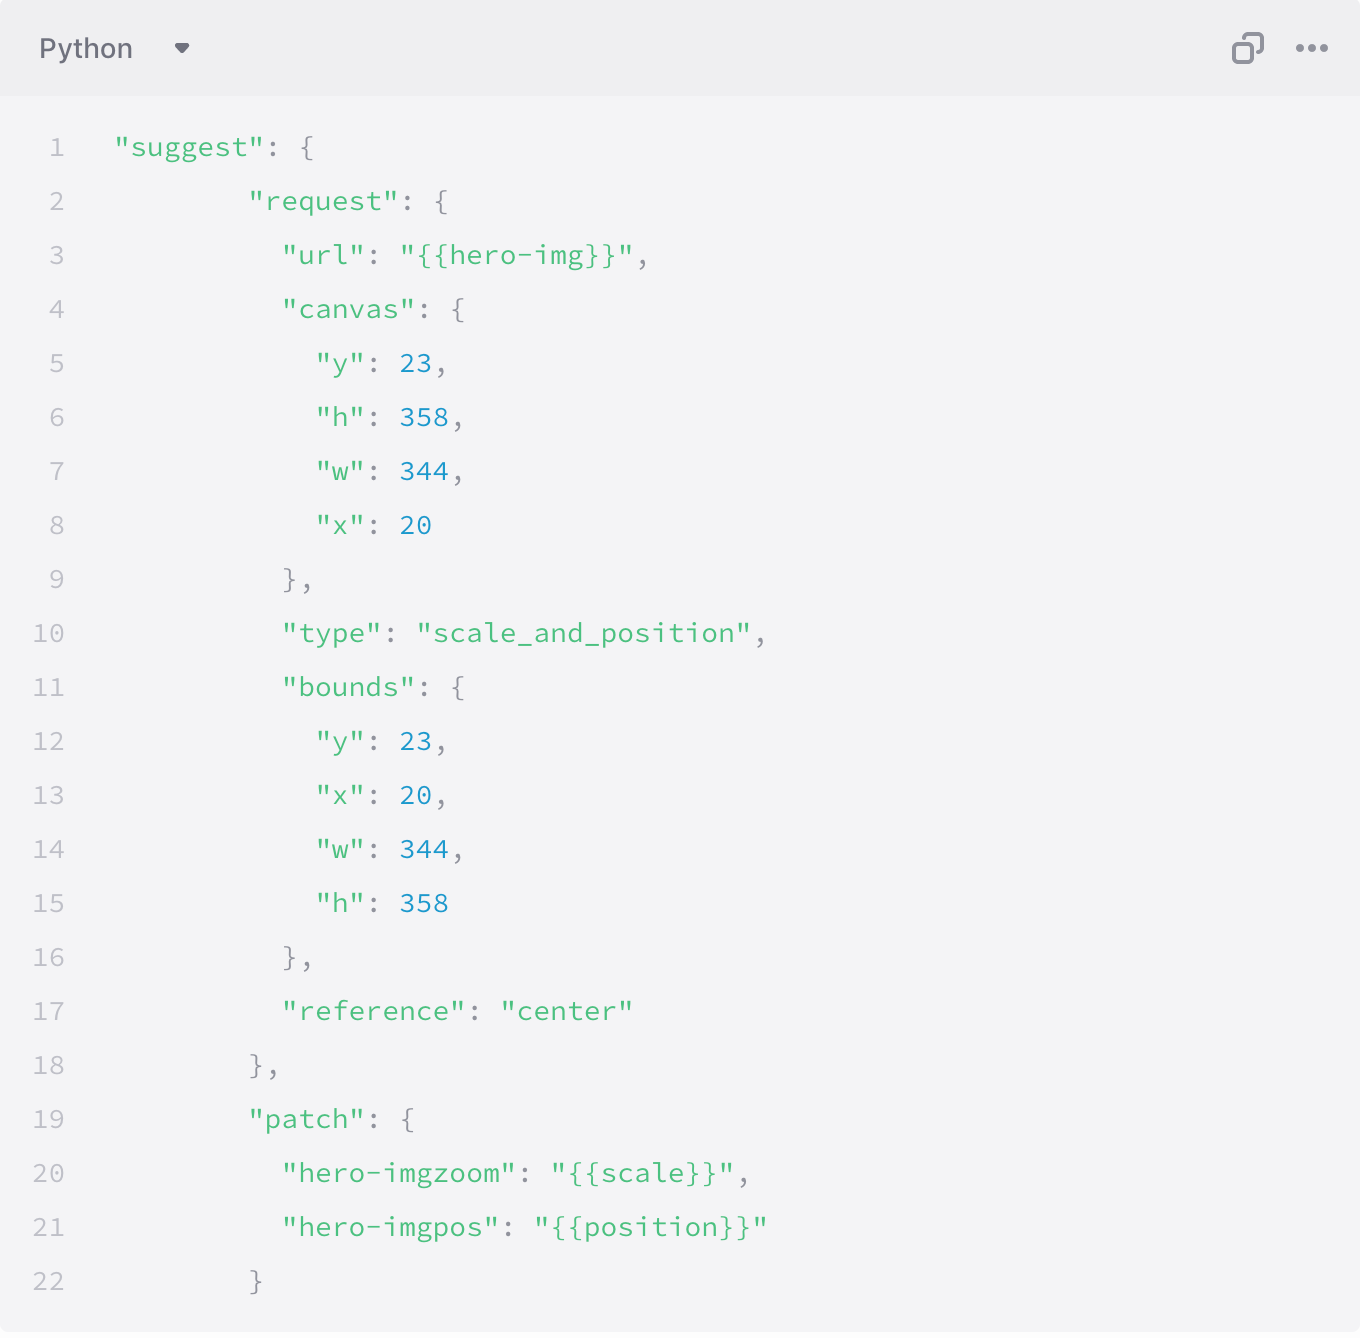
Where -
Canvas - Coordinates of the Area in which the the hero-img is contained in shot using contain:True parameter. X,Y are the coordinates of the top-left point of the box and w is the width of the box and h being height.
Bounds - Coordinates of the area in which you want the main object to be.X,Y are the coordinates of the top-left point of the box and w is the width of the box and h being height.
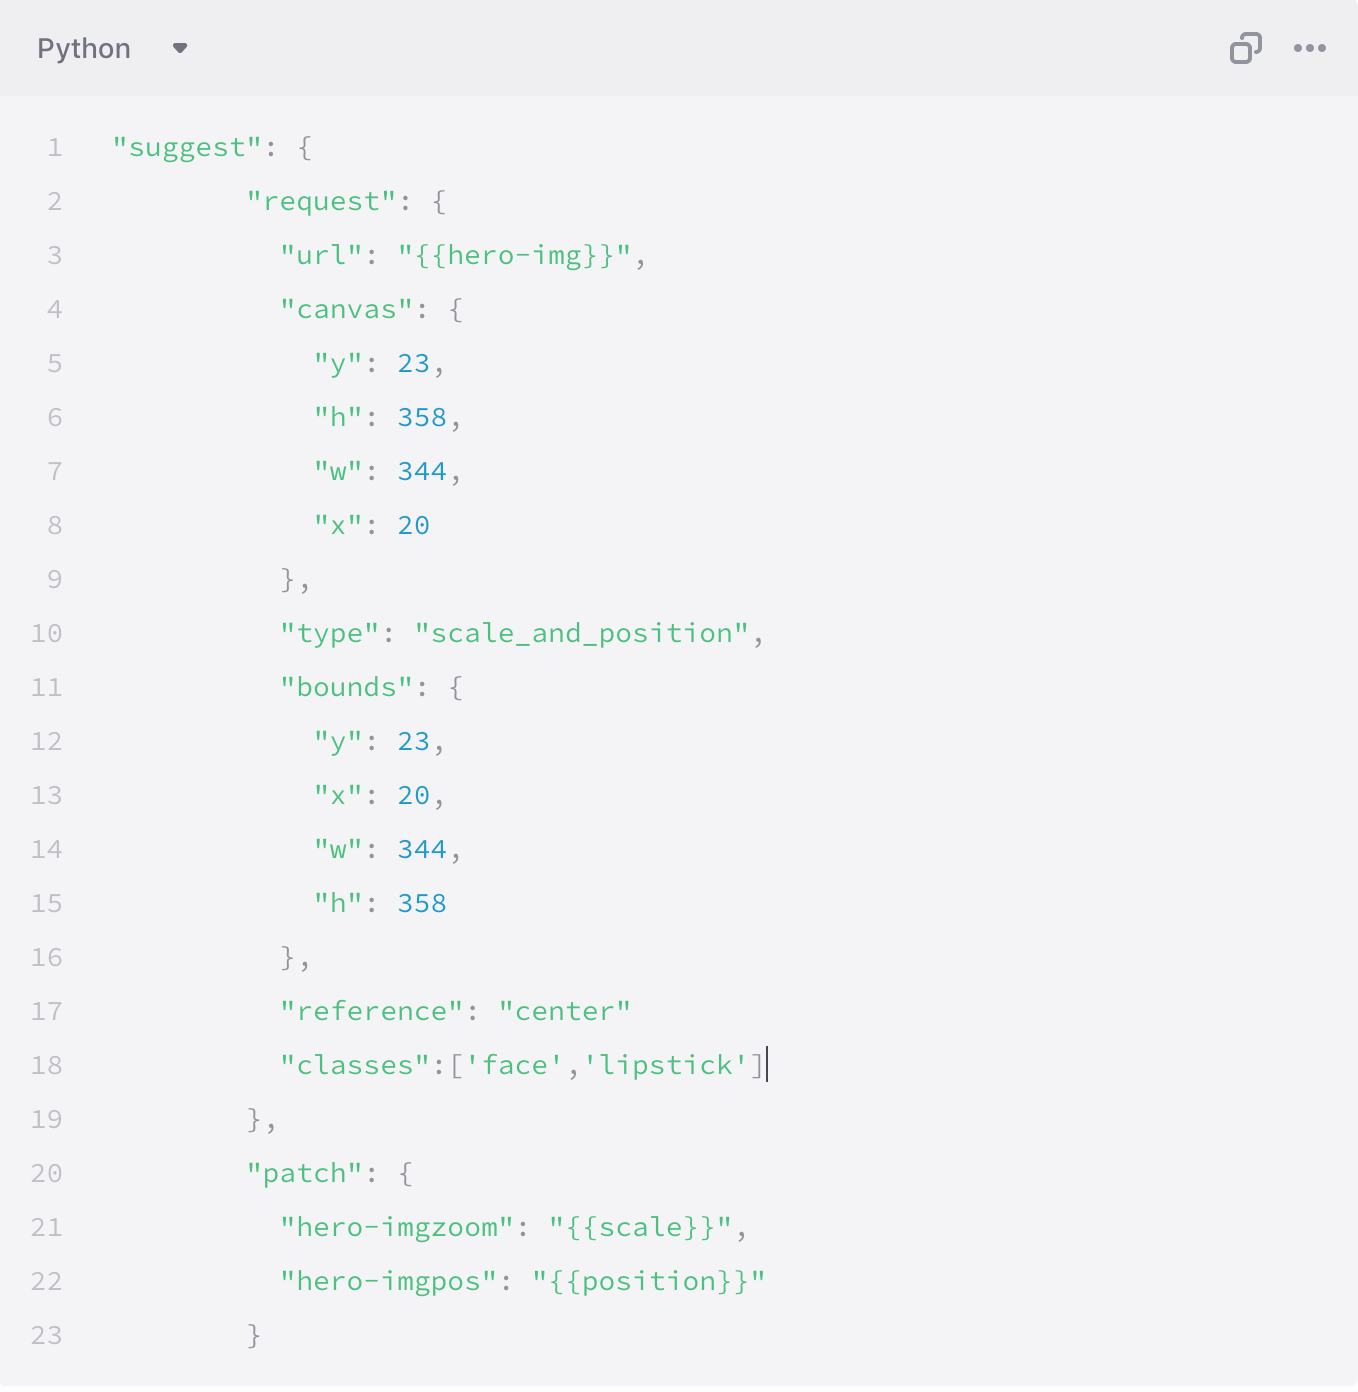
To focus on a specific object, all you need to do is add the classes parameter to the above request. You can add multiple classes to focus on!
You can try out how autoposition will behave while creating the storyboard -
Result -
Here is a video of what autoposition can do -
While auto-positioning is still in its infancy being iterated upon, we are excited by the possibilities and how it can save hours of grunt work for editors. 😁
Head over to our docs to learn about more such features.
We are hiring! Do write in to [email protected] if you are kicked about building the next generation of creative tech.